SarahB,
Per your request, I'm posting information regarding the three basic tools employed for ground training; usable for Parelli, Lyons, Brannaman, etc. I'll describe each in separate and succeeding posts, with accompanying photos.
The first item is:
1. A training halter for training yields (and thereby, compliance, acceptance, willingness) in the horse, in a variety of forms, through a variety of ground exercises. A "rope" halter is generally considered ideal, because there are few or no metal parts on the horses head (thereby lowering the risk of injury); and, they provide greater incentive to the horse to not lean on the halter (i.e., using "opposition reflex").
The rope halter can, and is worn under headstalls and bridles when trail riding (hacking out) as the rider chooses.
I tie a variety of light (3/16") to heavier (1/4", 5/16", 3/8") diameter rope halters. I use "poly" cord (rather than cotton or nylon) so that the halter has strength; but, will not tend to burn nor cut, when the horse leans on the halter (particularly, if the horse tends to pull back.) I buy various diameters of poly rope at the local "ranch supply" (a fancy name for a hardware store.)
I also use the "traditional" (double-overhand and fiador) knots, as they are readily adjustable, even if the horse has "set" the knots; and, I "whip" the end of the halter tie rope, or use "heat-shrink tubing" to secure the two ends together, rather than use metal crimps (as some manufacturers use.)
"How to…" instructions for tying (relatively) simple, yet fully-functional rope halters can be found here:
http://www.naturalhorse.com/archive/volume2/Issue7/article_13.php
http://www.naturalhorsesupply.com/tiehalter.shtml
http://www.spanishmustangs.net/RopeHalter.html
http://www.goddijn.com/halter/
And PDF Files:
http://ward-co.tamu.edu/publications/HowtoMakeARopeHalter.pdf
http://www.naturalhorsesupply.com/tiehalter.pdf
A complete set of reusable instructions (with diagrams) for tying the halter, with the traditional fiador and double overhand knots, can be purchased from http://www.ubraidit.com/ (This is what I started from; and use today.)
You may also do a search on the internet using the phrase rope halter, which renders in excess of 6700 hits; mostly firms selling rope halters for under $20 (USD). (Everyone is doing this!)
In addition, in the UK, this firm is selling the halters: http://www.scotknots.co.uk, at what appears to be a less than exorbitant price. (I'm sure there are additional sources locally to you; but, I didn't go though all 6700 hits.)
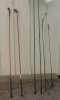
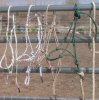
Note, in the photo below, the variety of sizes of halters; the construction all identical, except for the use of a string "whip" or "heat-shrink tubing" to secure the two ends of the halter rope together. The halter on the far right (the green halter) is a commercially manufactured halter of 3/8" diameter, with copper crimps on the end of the halter tie.
<more to follow>
Per your request, I'm posting information regarding the three basic tools employed for ground training; usable for Parelli, Lyons, Brannaman, etc. I'll describe each in separate and succeeding posts, with accompanying photos.
The first item is:
1. A training halter for training yields (and thereby, compliance, acceptance, willingness) in the horse, in a variety of forms, through a variety of ground exercises. A "rope" halter is generally considered ideal, because there are few or no metal parts on the horses head (thereby lowering the risk of injury); and, they provide greater incentive to the horse to not lean on the halter (i.e., using "opposition reflex").
The rope halter can, and is worn under headstalls and bridles when trail riding (hacking out) as the rider chooses.
I tie a variety of light (3/16") to heavier (1/4", 5/16", 3/8") diameter rope halters. I use "poly" cord (rather than cotton or nylon) so that the halter has strength; but, will not tend to burn nor cut, when the horse leans on the halter (particularly, if the horse tends to pull back.) I buy various diameters of poly rope at the local "ranch supply" (a fancy name for a hardware store.)
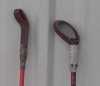
I also use the "traditional" (double-overhand and fiador) knots, as they are readily adjustable, even if the horse has "set" the knots; and, I "whip" the end of the halter tie rope, or use "heat-shrink tubing" to secure the two ends together, rather than use metal crimps (as some manufacturers use.)
"How to…" instructions for tying (relatively) simple, yet fully-functional rope halters can be found here:
http://www.naturalhorse.com/archive/volume2/Issue7/article_13.php
http://www.naturalhorsesupply.com/tiehalter.shtml
http://www.spanishmustangs.net/RopeHalter.html
http://www.goddijn.com/halter/
And PDF Files:
http://ward-co.tamu.edu/publications/HowtoMakeARopeHalter.pdf
http://www.naturalhorsesupply.com/tiehalter.pdf
A complete set of reusable instructions (with diagrams) for tying the halter, with the traditional fiador and double overhand knots, can be purchased from http://www.ubraidit.com/ (This is what I started from; and use today.)
You may also do a search on the internet using the phrase rope halter, which renders in excess of 6700 hits; mostly firms selling rope halters for under $20 (USD). (Everyone is doing this!)
In addition, in the UK, this firm is selling the halters: http://www.scotknots.co.uk, at what appears to be a less than exorbitant price. (I'm sure there are additional sources locally to you; but, I didn't go though all 6700 hits.)
Note, in the photo below, the variety of sizes of halters; the construction all identical, except for the use of a string "whip" or "heat-shrink tubing" to secure the two ends of the halter rope together. The halter on the far right (the green halter) is a commercially manufactured halter of 3/8" diameter, with copper crimps on the end of the halter tie.
<more to follow>
Attachments
Last edited: